Showing posts with label holiday crafts. Show all posts

Monday, November 21, 2011

A Crafty Thanksgiving Feast!

Last Friday I attended my daughter's Kindergarten Thanksgiving Feast.  It was blast!  I have to make mention of the craftiness that was used for their feast attire.  All the kids had made their own Indian vest and headdress as well as a Thankful place-mat.  In a previous post you will find instructions and materials needed for the Indian headdress.


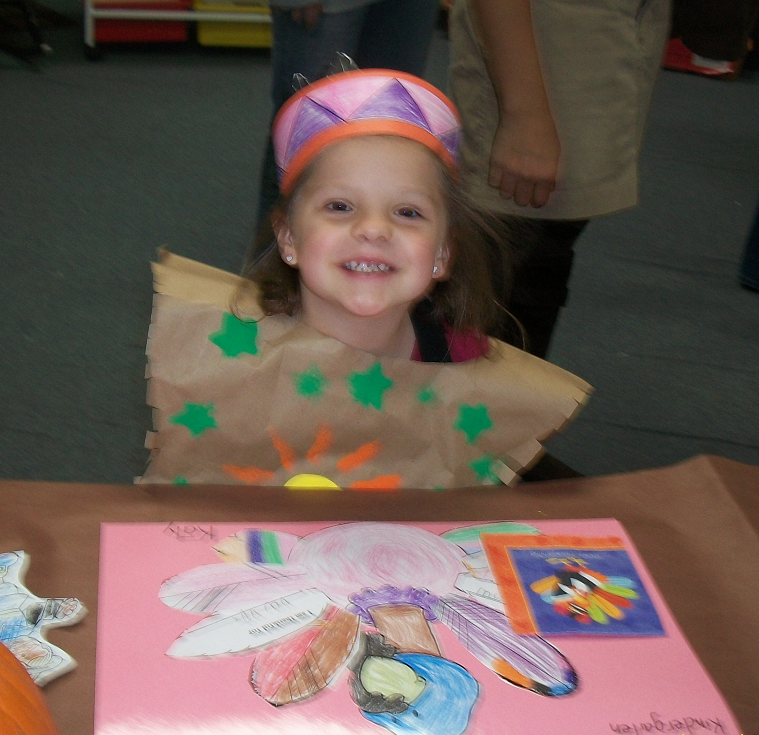
Make Thanksgiving fun this year for the kids by allowing them to decorate their own Thanksgiving table.  Notice the place-mat.  It is a turkey cut-out with feathers that state what the kids are thankful for.  My precious Katy is thankful for her Mommy and Daddy.  As I type this tears are filling my eyes.  I love it!  Along the tables are pumpkins.  I would suggest letting each child decorate their very own pumpkin in a Thanksgiving theme.  Also as a table decoration you have the Pilgrim cut-outs, which each child has colored.  Not only is this fun, but think about the extra time you'll have preparing your Thanksgiving feast while the kids are busy working on their very own decorations.  Nothing motivates a child more than feeling like they are responsible for something, especially when it's fun for them! 


Here's to hoping you and yours have a happy, safe, and FUN for the kids Thanksgiving!!

Saturday, November 19, 2011

Thanksgiving Crafts - Little Turkey Hat

 Courtesy of: Family Fun
Turkey Hat Completed
 
Materials
  • Scissors
  • Brown paper bags
  • Cardboard (cereal box)
  • Glue stick
  • Colored construction paper
  • 2 small white pom-poms
  • Black permanent marker
Instructions
  1. From the brown paper bags, cut a circle 3 1/2 inches in diameter for the turkey's head. Next, cut a 3-inch-wide band to fit around your child's head.
  2. From the cardboard, cut a strip 5 by 1 1/2 inches to use for a neck. Fold it three times accordion style, then glue one end to the back of the paper circle.
  3. For a beak, fold yellow construction paper and cut out a small double triangle (1 1/2 inches along the fold). Cut a rounded L from red paper for the turkey's wattle.
  4. To create eyes, draw a black circle on each pom-pom with the marker. Glue the eyes, wattle and one side of the beak to the head. Let them dry. Then, glue the loose end of the neck to the center of the headband.
  5. Now, wrap the headband around your child's head; mark where the ends overlap, then remove the band and glue the ends. Finally, glue on construction paper feathers and wings.

A Cardboard Christmas! Reduce, Reuse, and Recycle

Cardboard Santa!
A couple years back I had a ton of large cardboard boxes taking up space in my storage shed.  Yes, even though they were folded up, they were taking up valuable space.  I had a creative idea, as I often do when I can't bring myself to get rid of things.  I got out my kids' coloring books and starting drawing the characters onto the cardboard boxes.  We painted them, cut them out, and used them for decorations that year.  It was a blast and my kids asked me this year if we can do that again.  Of course, I said yes!  When we get started I will post more about it, but until then, please enjoy the pictures from the first Cardboard Christmas at the Reed Household.


Bear and Stocking!


Cardboard Elf!

Lane and the Snow Bunny

Cardboard Frosty

My kiddos helping out!  Man, they were so small!